26 Apr, 2024
Welcome! Guest
[ Login ]
Home | Customer Centre | Support Centre
RSS | Set Homepage | Favorite
Search:
Browse:

Windows Mail Setup Tutorial

Date Created: 28 Jun, 2008   (15 year(s) ago) Viewed: 8000 Rating: 

Overview

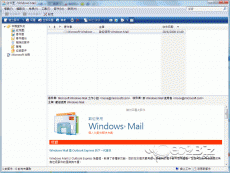
Windows Mail Setup Tutorial
Click to Enlarge
Windows Mail Setup Tutorial
Windows Mail in Windows Vista addresses today's serious concerns about junk mail, e-mail, and phishing attacks, while adding new features that help you search and manage the increasing volume of e-mail messages that you receive.

In this tutorial we will learn how to setup Outlook Express for use with your new hosting email account.

What you will Need:

  • A valid email account, if you haven't created an email account yet please log into your Control Panel and set up an email account.
  • An email client. This tutorial uses Windows Mail, which is a pre-installed component of Windows Vista.
Attention
  • As a convenience to users, we provide information about how to use certain third-party products, but we do not have technical support third-party products. we are not responsible for the functions or reliability of such products.
  • Windows is a trademark of Microsoft Corporation.
*** The above information is for reference only, Please seek independent technical advice if found necessary.

Guide

Step 1

Start Windows Mail by selecting it from the Start Menu.

If you do not see Windows Mail on the Start Menu, select Default Programs and then select Set your default programs. Under Programs select Windows Mail. Click Set this program as default, then click OK. Close the Default Programs box. Windows Mail should now appear on the Start Menu.
Step 1
Click to Enlarge
Step 1

Step 2

If this is the first time you have started Windows Mail, the setup wizard will automatically open. If it does, skip ahead to step 4.

If the wizard does not start, click the Tools menu at the top of the window, then click Accounts.
Step 2
Click to Enlarge
Step 2

Step 3

Click the Add... button at the upper right of the Internet Accounts window. Select E-mail Account and click Next.
Step 3
Click to Enlarge
Step 3

Step 4

Enter your real name as you would like it to be displayed on outbound email (e.g., Jane Doe), and click Next.
Step 4
Click to Enlarge
Step 4

Step 5

Enter your email address (e.g., ec2biz@ec2bizcom.com), and click Next.
Step 5
Click to Enlarge
Step 5

Step 6

On the "Set up e-mail servers" window: in the Incoming e-mail server type box, choose either POP3 or IMAP depending on which type of mailbox you use. If you are not sure, choose POP3.

Enter mail.yourdomain.com in the Incoming mail (POP3 or IMAP) server box.
Enter mail.yourdomain.com in the Outgoing e-mail server (SMTP) name box.
Put a check in the box Outgoing server requires authentication. Click Next.

(Enter your domain instead of "yourdomain.com".)
Step 6
Click to Enlarge
Step 6

Step 7

Enter your email address (e.g., janedoe@yourdomain.com) in the E-mail username box and your password in the Password box. Verify that the Remember password box is checked. Click Next.
Step 7
Click to Enlarge
Step 7

Step 8

On the last screen, click Finish.
Step 8
Click to Enlarge
Step 8

Step 9

If the Internet Accounts box appears, click the Close button. Windows Mail is ready to use.
Step 9
Click to Enlarge
Step 9
Was this article helpful?
You can bookmark it with your tracker:DiggredditDeliciousGoogle BookmarksWindows LiveFacebookSlashdot BookmarksPropellerTechnoratiBlinkListYahoo bookmarksMa.gnoliaSquidoo
Permalink:  
 
ec2Biz.com Interactive Multimedia Ecommerce Web Hosting Online Shop Domain name Solutions
© Focus Network Company. All Rights Reserved.